Hey, here is the second male card I've made recently, this time for my housemates 23rd Birthday...he is a drummer so will appreciate the image! :D
I used the image 'Buggin Drummer' from Kenny K and coloured it using copics markers. I then cut it into a spelbinders die and edged it with blue ink.
For the rest of the card, I backed the main image with white and blue spotty paper, also edged with blue. I then added a square of turquoise blue paper before adding the image.
I then added musical ribbon across the bottom and a 'Birthday Wishes' sentiment across the top corner of the image. To finish, I added card candy in two lines of three up each side of the card.
I would like the enter this card into the following challenges: -
kenny ks krafty krew - being square
copic marker europe - card for a man - Ends 14th April
delightful sketches - all about music
eureka stamps - stripes or circles
top tip tuesday - boys and girls come out to play
tsg clear stamps - masculine
Saturday, 6 April 2013
Wednesday, 20 March 2013
Steampunk Birthday
Hey, made this card for a friend's birthday, this one turned out better then I expected as male cards are hard to create!
I started by colouring the 'Steampunk Doggy' image in with my promarkers and edging the image with copper ink.
I then used my new die to cut a patterned backing square and a smaller sentiment square. I used a silver backing card, and backed this with a blue dotty paper, edged with copper ink. I used peel offs to create the sentiment square, also edged with copper ink.
I attached the patterned square and image and then added ribbon stuck down the edge of the card. To finish, I added two stripey card candy in opposite corners.
I would like to enter this card into the following challenges :-
delightful sketches - one for the boys
creative card crew - masculine
ooh-la-la-creations challenges - it's a man thing
stamping with dragon - it's a dogs life
crafty ribbons challenge - One for the boys
I started by colouring the 'Steampunk Doggy' image in with my promarkers and edging the image with copper ink.
I then used my new die to cut a patterned backing square and a smaller sentiment square. I used a silver backing card, and backed this with a blue dotty paper, edged with copper ink. I used peel offs to create the sentiment square, also edged with copper ink.
I attached the patterned square and image and then added ribbon stuck down the edge of the card. To finish, I added two stripey card candy in opposite corners.
I would like to enter this card into the following challenges :-
delightful sketches - one for the boys
creative card crew - masculine
ooh-la-la-creations challenges - it's a man thing
stamping with dragon - it's a dogs life
crafty ribbons challenge - One for the boys
Monday, 11 March 2013
Happy Mothers Day
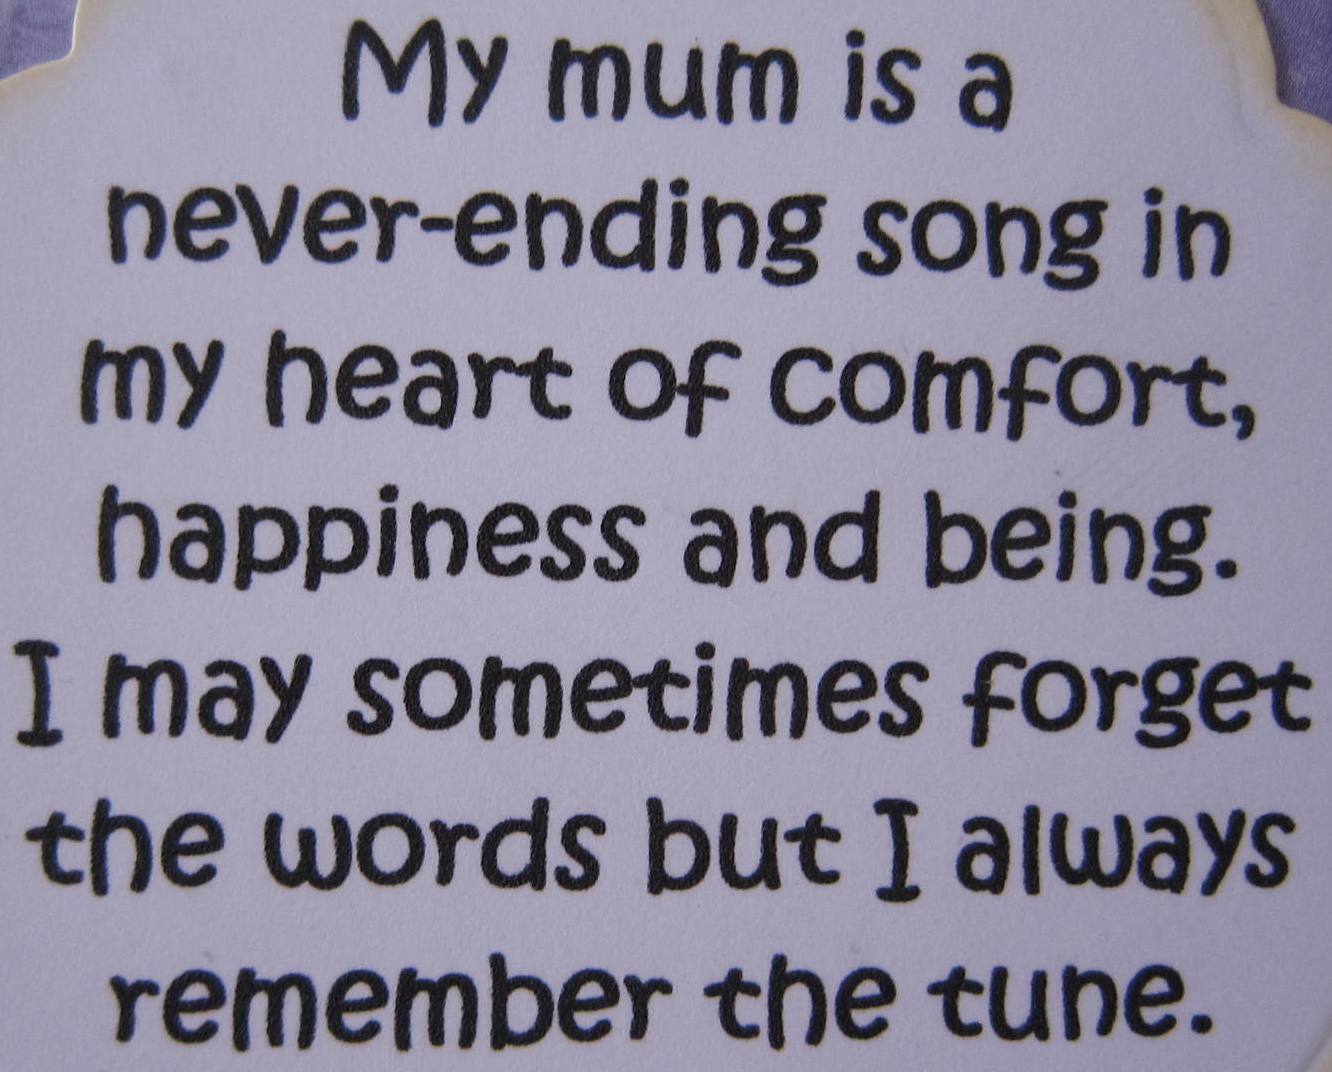
Hey, here is the card I made for my mum this year...she loved it :)
I started by printing my sentiment and cutting it out with my only cutting die, edging it with pale yellow ink and then cutting a purple backing with the larger cutting die. I then backed the sentiment and backing with a doily.
I edged the backing card with purple ink and then covered it with cream patterned card.
I attached the main sentiment into the top right hand corner of the card and then added purple wavy and white music ribbon to the bottom of the card. I added a butterfly brad to the top corner above the sentiment.
To enhance the sentiment, I added five flowers which I built up from deep purples to lilacs with a brad in the centers. To these flowers, I added three wired gems. To finish, I added two lilac pearls in opposite corners of the card.
I would like to enter this card into the following challenges: -
joanna sheen challenge - mums the word
cupcake craft challenges - its only words
dream valley challenges - mothers day
sugar creek hollow - photo inspiration
crafts 4 eternity - marvellous mums
love to create challenge - lavender and lace
I started by printing my sentiment and cutting it out with my only cutting die, edging it with pale yellow ink and then cutting a purple backing with the larger cutting die. I then backed the sentiment and backing with a doily.
I edged the backing card with purple ink and then covered it with cream patterned card.
I attached the main sentiment into the top right hand corner of the card and then added purple wavy and white music ribbon to the bottom of the card. I added a butterfly brad to the top corner above the sentiment.
To enhance the sentiment, I added five flowers which I built up from deep purples to lilacs with a brad in the centers. To these flowers, I added three wired gems. To finish, I added two lilac pearls in opposite corners of the card.
I would like to enter this card into the following challenges: -
joanna sheen challenge - mums the word
cupcake craft challenges - its only words
dream valley challenges - mothers day
sugar creek hollow - photo inspiration
crafts 4 eternity - marvellous mums
love to create challenge - lavender and lace
Tuesday, 19 February 2013
Jungle Mobile
Hey; as lectures have been cancelled today, here is a project I worked on last summer.
I made this mobile for Heidi Skye for her Christening present; She is a beautiful baby :)
I started by cutting the fabric out for the animal squares and the hanger of the mobile. I covered each square with an animal fabric using pinflair glue.
I cut lengths of ribbon to hang the squares with, making them different lengths. I then stuck two different animals together with the lengths of ribbon coming out the top and bottom of the squares. I stuck the hangers together with the animal square lengths hanging out the bottom and a loop of ribbon coming out the top to hang the mobile with.
I would like to enter this project into the following challenges: -
eureka stamps - inspired by a song
creative creations challenges - inspired by a song
kaboodle doodles - anything but a square
simply create too - for a female
crafty boots challenges - out of your comfort zone
cheerful stamp pad - anything but a card
glitter n sparkle challenge - anything but a card
I made this mobile for Heidi Skye for her Christening present; She is a beautiful baby :)
I started by cutting the fabric out for the animal squares and the hanger of the mobile. I covered each square with an animal fabric using pinflair glue.
I cut lengths of ribbon to hang the squares with, making them different lengths. I then stuck two different animals together with the lengths of ribbon coming out the top and bottom of the squares. I stuck the hangers together with the animal square lengths hanging out the bottom and a loop of ribbon coming out the top to hang the mobile with.
I would like to enter this project into the following challenges: -
eureka stamps - inspired by a song
creative creations challenges - inspired by a song
kaboodle doodles - anything but a square
simply create too - for a female
crafty boots challenges - out of your comfort zone
cheerful stamp pad - anything but a card
glitter n sparkle challenge - anything but a card
Monday, 18 February 2013
Happy 25th Anniversary
Hey, I made this card for mum and dad for their 25th Wedding Anniversary last year but have only just got round to blogging it...Belated congratulations you two :)
I used the digi image called 'Valentines Night' from the Crafts and Me website and coloured it using my promarkers. I added gold, silver and green glitter to the fairies wings to make them sparkle.
I then cut the image into a rectangle and rounded the two right hand corners. I punched the left hand egde with a flower border punch and then edged the image with green ink. I then backed the image with silver holographic card.
I edged my backing card with dark green ink and then backed it with dark green card followed by green fairy paper. I chose a further fairy patterned paper and backed this with silver paper. I cut these to different sizes and attached them in the top right hand corner of the paper.
I raised the letters of 'Happy Anniversary' across the top and down the side of the image at different angles. I coloured green the felt numbers '25' and stuck these onto green card and backed this with silver card; I attached this to the bottom left corner of the image. I added four green flowers to the card, which I inked with green and silver for effect. I added two silver wired flowers to the groups of flowers. To finish, I used round and heart shaped silver gems to the top corner and boarder of the image.
I would like to enter this card into the following challenges: -
not real stamps - love
the sweet pea stampers - goes digital
pumpkin spice - love
crafty calendar challenge - love and marriage
creatalicious challenges - love
emergency crafters challenge - romance
I used the digi image called 'Valentines Night' from the Crafts and Me website and coloured it using my promarkers. I added gold, silver and green glitter to the fairies wings to make them sparkle.
I then cut the image into a rectangle and rounded the two right hand corners. I punched the left hand egde with a flower border punch and then edged the image with green ink. I then backed the image with silver holographic card.
I edged my backing card with dark green ink and then backed it with dark green card followed by green fairy paper. I chose a further fairy patterned paper and backed this with silver paper. I cut these to different sizes and attached them in the top right hand corner of the paper.
I raised the letters of 'Happy Anniversary' across the top and down the side of the image at different angles. I coloured green the felt numbers '25' and stuck these onto green card and backed this with silver card; I attached this to the bottom left corner of the image. I added four green flowers to the card, which I inked with green and silver for effect. I added two silver wired flowers to the groups of flowers. To finish, I used round and heart shaped silver gems to the top corner and boarder of the image.
I would like to enter this card into the following challenges: -
not real stamps - love
the sweet pea stampers - goes digital
pumpkin spice - love
crafty calendar challenge - love and marriage
creatalicious challenges - love
emergency crafters challenge - romance
Musical Guitar
Hello :) It's been a while since I've posted a blog so bear with me!
I made this card yesterday and wanted to post it so mum can see it...
I cut this digi image into a die and then cut a larger boarder from stripy paper; I then coloured the image with my promarkers, using the backing paper as a colour scheme. I edged both the image and the printed sentiment with purple ink before backing the sentiment with green card.
I edged the card with green ink and backed it with lilac patterned paper. I cut a half size piece of purple holographic paper and attached this across the bottom of the card. I then made six die cut flowers and embossed them using the new embossing powders I got for Christmas. I built each flower up using green, violet and pearl colours before topping them with a green gem. Finally, I added green gems to the top right hand corner of the card and to the opposite corners of the sentiment which I raised over the corner of the image.
I would like to enter this card into the following challenges: -
Come and get it challenges - colourful challenge
lori designs - use a sentiment
crafty catz weekly challenge - eyes-down-its-bingo-time - Flowers, Dies, Embossing
lisa somerville - dies/punches
pink gem challenge - dies/punches
i love promarkers - one for the girls
I made this card yesterday and wanted to post it so mum can see it...
I cut this digi image into a die and then cut a larger boarder from stripy paper; I then coloured the image with my promarkers, using the backing paper as a colour scheme. I edged both the image and the printed sentiment with purple ink before backing the sentiment with green card.
I would like to enter this card into the following challenges: -
Come and get it challenges - colourful challenge
lori designs - use a sentiment
crafty catz weekly challenge - eyes-down-its-bingo-time - Flowers, Dies, Embossing
lisa somerville - dies/punches
pink gem challenge - dies/punches
i love promarkers - one for the girls
Wednesday, 3 October 2012
Happy 50th Birthday Saavy!
Hey, here is my Dad's 50th Pirate themed Birthday card (he loves Pirate of the Caribbean). I made it this morning as I thought I should probably get a move on as his Birthday is on Saturday!...Happy Birthday Dad!!!!!!!!!!!!!!!!
I started by colouring the image in with my promarkers and edging it with black ink. I backed this image with two different brown papers. I edged the backing card with brown ink and covered it with a creamy browny paper.
For the map backing, I printed a map onto printable fabric and stuck this onto card. I then used matches burnt two of the sides to give it a piraty effect! I edged the other two side with black ink to match the burnt sides. I attached this onto the backing card and attached my image on the right side of the card. I then used gold chipboard letters to spell DAD in the bottom left of the card. I stick 50! onto cream card and daubed the card brown; I raised this up onto the top left side of the card. To finish, I raised a skull and crossbones overlapped onto the 50! and attached a brad into the top corner of the image.
I would like to enter this card into the following challenges: -
promarker challenge - man/youth
charisma cardz - for a guy
red carpet studio challenge - disney challenge
crafty anns challenge - inspired by a film - Pirates of the Caribbean
crafty mess challenge - distressed/aged
oldie but a goodie challenge - inspired by a song
I started by colouring the image in with my promarkers and edging it with black ink. I backed this image with two different brown papers. I edged the backing card with brown ink and covered it with a creamy browny paper.
For the map backing, I printed a map onto printable fabric and stuck this onto card. I then used matches burnt two of the sides to give it a piraty effect! I edged the other two side with black ink to match the burnt sides. I attached this onto the backing card and attached my image on the right side of the card. I then used gold chipboard letters to spell DAD in the bottom left of the card. I stick 50! onto cream card and daubed the card brown; I raised this up onto the top left side of the card. To finish, I raised a skull and crossbones overlapped onto the 50! and attached a brad into the top corner of the image.
I would like to enter this card into the following challenges: -
promarker challenge - man/youth
charisma cardz - for a guy
red carpet studio challenge - disney challenge
crafty anns challenge - inspired by a film - Pirates of the Caribbean
crafty mess challenge - distressed/aged
oldie but a goodie challenge - inspired by a song
Thursday, 27 September 2012
Scarcrow Fall
Here is an autumn card I made using my new stamps that I won from winning a DRS designs challenge.
I stamped both the scarecrow and sentiment and coloured the scarecrow using my promarkers. I then edged the sentiment with orange ink and the scarecrow with gold ink. I backed the image with green card and the sentiment with green then yellow card.
I edged the backing card with yellow ink and covered it with orange holographic card. I covered the backing with two pieces of stripy orange and green ribbon. I attached my image and sentiment onto the card at angles and embellished it with gold fabric leaves. To finish, I then attached two embossed gold leaves from my stash.
I would like to enter this card into the following challenges: -
scrapbook stamp society - autumn - Ends 11th October
Tuesday, 25 September 2012
Mousy Birthday Wishes
Hey, here is a quick card I made for my music lecturer at uni; shes great and has been so helpful, she will love this card!
I stamped the wooden Penny Black stamp and coloured it using my promarkers; my lecturer will love the different coloured mice :) I then edged it with turquoise ink and backed it with dark blue card. I covered the backing card with musical instrument paper and a strip of turquoise card down the side. I covered the bottom of the image backing with turquoise musical ribbon and attached the image at an angle onto the card. I raised a 'Birthday Wishes' greeting backed with dark blue card onto the top left corner of the card. I embellished it with four blue brads in the corners and musical note stickers overlapped onto the edge of the image.
I would like to enter this card into the following challenges: -
allsorts challenge - inspired by a song - Inspired by 'Three Blind Mice'
crafts 4 eternity - nursery rhymes - Inspired by 'Three Blind Mice'
polka doodle - inspired by a song title - Inspired by 'Three Blind Mice'
Sunday, 23 September 2012
Time To Call Tech Support
Hey, here is a card I made for the company I worked for over the summer. Vebox limited is my cousins business and I have had a great time working with them; for any computer parts you need take a look at their website: http://www.vebox.com/. - Thanks guys!!!! :D
I decided to make them a computer card with two Doodle Pantry digi images which mum hasn't used yet ;) I coloured the two images using copics markers (I left my promarkers at uni lol) and edged them with yellow ink.
I then backed them both with turquoise ink from mums scraps box and attached a strip of multicoloured beads across the bottom of the images. I used blue card for the base card and turquoise spotty/stripy paper for the backing which I also edged with yellow ink.
I made a tag from yellow card onto which I mounted my sentiment (also from doodle pantry). To this I added different coloured card candy and turquoise and brown spotty ribbon. I then raised the tag onto the centre of the card.
I added two corners to my images that I found im mums stash and also two yellow gems to the corners of the card.
I would like to enter this card into the following challenges: -
doodle pantry blog - digital challenge
aud sentiments challenge - something funny hunny
cards for men - going digital
crazy challenge - spots or stripes
forever friends challenge - colour pick
tuesday throwdown - corners
corrosive challenges by janet - animal companions
I made a tag from yellow card onto which I mounted my sentiment (also from doodle pantry). To this I added different coloured card candy and turquoise and brown spotty ribbon. I then raised the tag onto the centre of the card.
I added two corners to my images that I found im mums stash and also two yellow gems to the corners of the card.
I would like to enter this card into the following challenges: -
doodle pantry blog - digital challenge
aud sentiments challenge - something funny hunny
cards for men - going digital
crazy challenge - spots or stripes
forever friends challenge - colour pick
tuesday throwdown - corners
corrosive challenges by janet - animal companions
Pink Ribbon Creation
Hey, here is a card I made to support the Link up for Pink challenge. We got the template from a craft show and I've been wanting to try it.
Firstly I backed the card with pink paper which I edged with pink ink. I then tied pearlescent pink ribbon down the side of the card. I cut the size of my template onto white card and edged the with pink ink before backing it onto pale pink card. I attached this to my card and layed the template over the top. I then used Hotfix Rhinestones and Pearls together with the Hotfix applicator to make the breast cancer ribbon logo. To finish, I stamped 'The Power of Pink' sentiment into white card with a boarder around it and cut this into a circle. To finish I inked this with pale pink ink and raised it up off centre of my card.
I would like to enter this card into the following challenges: -
link up for pink - challenge 6
oozak - sparkle
southern girls - bling bling
paper-crafting journey - use a sentiment
avadares challenge - make it sparkle
that craft place - bling it on
word art wednesday - friends
Firstly I backed the card with pink paper which I edged with pink ink. I then tied pearlescent pink ribbon down the side of the card. I cut the size of my template onto white card and edged the with pink ink before backing it onto pale pink card. I attached this to my card and layed the template over the top. I then used Hotfix Rhinestones and Pearls together with the Hotfix applicator to make the breast cancer ribbon logo. To finish, I stamped 'The Power of Pink' sentiment into white card with a boarder around it and cut this into a circle. To finish I inked this with pale pink ink and raised it up off centre of my card.
I would like to enter this card into the following challenges: -
link up for pink - challenge 6
oozak - sparkle
southern girls - bling bling
paper-crafting journey - use a sentiment
avadares challenge - make it sparkle
that craft place - bling it on
word art wednesday - friends
Monday, 27 August 2012
Best Friends Until Forever
Hey, made this card to write a note in for my friend who is away at university. I stamped the image at a friends house as I thought it was very cute :)
I stamped the image which contained the sentiment and coloured it using my promarkers. I then cut it into a scalloped boarder and edged it with pink ink. I cut a second scalloped backing for the image from yellow paper.
I used a scalloped edged card blank which I backed with pink paper and then stripey paper. I tied yellow spotty ribbon down the side of the card and attached pink flowery ribbon across the bottom. I attached a yellow and pink flower with smaller rose flowers in the centre to the bottom of the card and two pink gems to the corners of the yellow backing. To finish, I cut two butterflies from metallic pink card and slotted them onto the image corner and yellow backing...simple but lovely!
I would like to enter this card into the following challenges: -
365 cards - stand out stripes
cc monthly challenge - best friends
little claires designs - best friends
pile it on challenge - I spy something with P
flutterby wednesdays - friendship
I stamped the image which contained the sentiment and coloured it using my promarkers. I then cut it into a scalloped boarder and edged it with pink ink. I cut a second scalloped backing for the image from yellow paper.
I used a scalloped edged card blank which I backed with pink paper and then stripey paper. I tied yellow spotty ribbon down the side of the card and attached pink flowery ribbon across the bottom. I attached a yellow and pink flower with smaller rose flowers in the centre to the bottom of the card and two pink gems to the corners of the yellow backing. To finish, I cut two butterflies from metallic pink card and slotted them onto the image corner and yellow backing...simple but lovely!
I would like to enter this card into the following challenges: -
365 cards - stand out stripes
cc monthly challenge - best friends
little claires designs - best friends
pile it on challenge - I spy something with P
flutterby wednesdays - friendship
Sunday, 19 August 2012
Balloon Love
Hey, here is a card I made with a free stamp I won at a show :) It also matches the DRS Designs challenge which is balloons.
I stamped the gorjuss image and coloured it using my promarkers. I kept the colour scheme to blue as this is one of my favourite colours. I cut the image into an oval, sanded the edge and inked it blue. I then cut a blue spotty paper for the backing of my card and inked the edge dark blue.
I then embossed a piece of dark blue card with a circles embossing folder. I then backed this with silver card and sanded the edge of both before inking them blue. I attached my image and then made a blue bow for the bottom right hand corner. I added a 'With Love to You' sentiment backed with pale blue and raised this up in the top left corner. To finish, I added four silver circle embellishments with blue star card candy in the centre of two of the circles.
I would like to enter this card into the following challenges: -
drs designs blog - balloons
twisted tuesday challenges - are you blue
my heart pieces digital stamp challenge - fav colour
deep ocean challenge - deep blue
charisma cardz - monochrome
sir stampalot challenge - Take flight
I then embossed a piece of dark blue card with a circles embossing folder. I then backed this with silver card and sanded the edge of both before inking them blue. I attached my image and then made a blue bow for the bottom right hand corner. I added a 'With Love to You' sentiment backed with pale blue and raised this up in the top left corner. To finish, I added four silver circle embellishments with blue star card candy in the centre of two of the circles.
I would like to enter this card into the following challenges: -
drs designs blog - balloons
twisted tuesday challenges - are you blue
my heart pieces digital stamp challenge - fav colour
deep ocean challenge - deep blue
charisma cardz - monochrome
sir stampalot challenge - Take flight
Everyone Deserves A Fairytale
Hey, here is a card I made with a new stamp from my birthday; it is called Lucy by Kraftin Kimmie Stamps. I made this card with Shabby Tearoom challenge in mind.
I stamped the image in black and coloured her using promarker and copics pens. I also stamped and coloured two little books to add extra. I then cut her into a rounded boarder and inked the edge aqua.
I decided to make an easel card, so after folding the backing so the front stands up, I chose my papers. I backed the card with pink flowers paper and mounted the image on aqua paper. I inked round the edge of the baking card with pale pink ink and edged the papers with pink and aqua respectively. I then built up two flowers for opposite corners with pink and aqua flowers, in the centre of which I mounted a book. To finish the front, I added two sticky swirls which I topped with dark pink, aqua and pale pink velvet crush; I topped these off with rainbow drops.
I then worked on the flat base of my card; I backed it with pale pink card which I edged aqua. I cut out my 'Everyone Deserves A Fairytale' headline and inked this pale pink and aqua. I mounted it on pink, aqua and cream patterned papers and added a crushed velvet strip along the bottom of the pink backing; I then raised this onto the pink backing paper. I added two rainbow drops to the top corners of the pink backing so the front of my card has them to sit against when stood up. I added three more crushed velvet swirls and two flowers to make the base more exciting and finally attached both pieces together. Lovely :)
I would like to enter this card into the following challenges: -
the shabby tea room - for the love of books
sassy cheryls challenge - fav colour combo
wags n whiskers rubber stamps - fav colour combo
ready teddy go - anything goes
word art wednesday - word art wednesday
house of gilli - add sentiment
I stamped the image in black and coloured her using promarker and copics pens. I also stamped and coloured two little books to add extra. I then cut her into a rounded boarder and inked the edge aqua.
I would like to enter this card into the following challenges: -
the shabby tea room - for the love of books
sassy cheryls challenge - fav colour combo
wags n whiskers rubber stamps - fav colour combo
ready teddy go - anything goes
word art wednesday - word art wednesday
house of gilli - add sentiment
Tuesday, 14 August 2012
Birthday Boy Wishes
Hey, here is a card I made for a little boy with the DRS designs challenge 'Wheels' in mind; I also used all paper scraps to make this it :)
Firstly, I stamped the image from Ladybug Crafts Ink and coloured it using copics markers. I then cut him into a rectangle, rounded the corners and inked the edge brown. I then cut a larger blue backing which I also inked brown. I backed the card with brown patterned paper and cut three brown and blue rectangles to sit vertically down the card which I backed with navy blue card. I chose a 'Brithday Wishes' sentiment and backed this with navy and red card. To finish, I added three buttons tied with brown twine down the edge with the blue image backing.
I would like to enter this card into the following challenges: -
drs designs blog - wheels
2 sisters challenge blog - on the farm
pause dream enjoy challenges - around the farm
great impressions stamps - animal
created with love challenges - birthday
hiding in my craft room - super scraps
wags n whiskers rubber stamps - birthday
scrap creations - kids theme
Firstly, I stamped the image from Ladybug Crafts Ink and coloured it using copics markers. I then cut him into a rectangle, rounded the corners and inked the edge brown. I then cut a larger blue backing which I also inked brown. I backed the card with brown patterned paper and cut three brown and blue rectangles to sit vertically down the card which I backed with navy blue card. I chose a 'Brithday Wishes' sentiment and backed this with navy and red card. To finish, I added three buttons tied with brown twine down the edge with the blue image backing.
I would like to enter this card into the following challenges: -
drs designs blog - wheels
2 sisters challenge blog - on the farm
pause dream enjoy challenges - around the farm
great impressions stamps - animal
created with love challenges - birthday
hiding in my craft room - super scraps
wags n whiskers rubber stamps - birthday
scrap creations - kids theme
Sunday, 12 August 2012
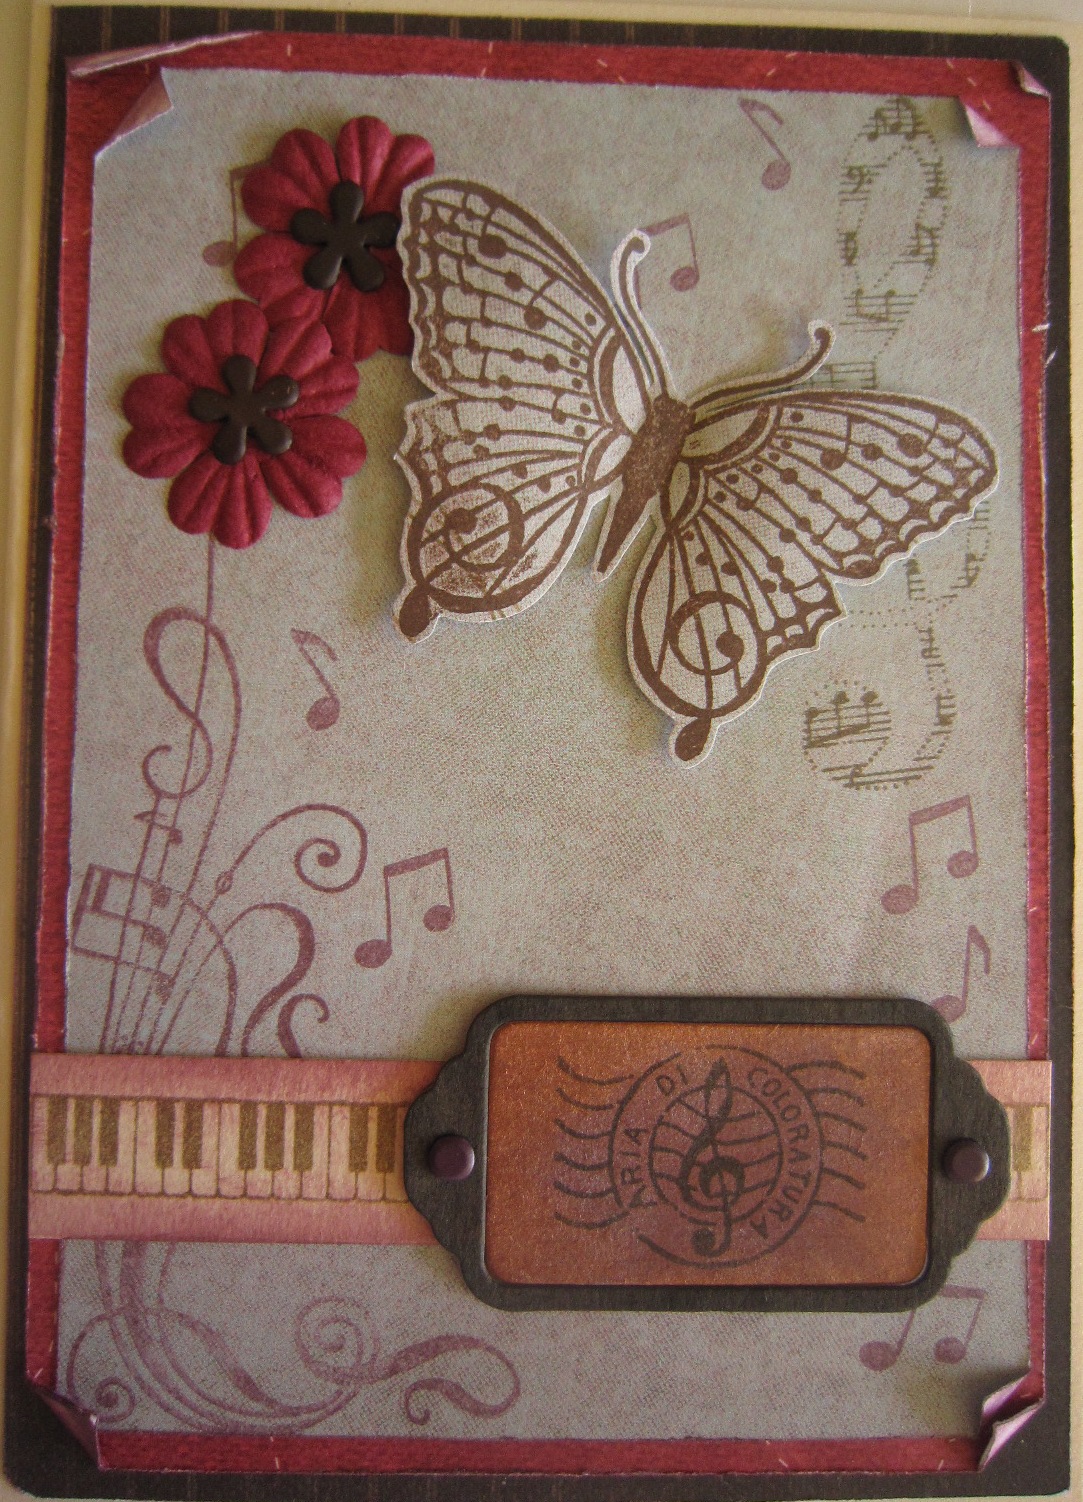
Aria Di Colorature
Hey, here is a card I made for a friend using a new stamp set I got for my birthday.
Firstly, I chose three corresponding papers; I then cut them to size and roughed the edged. I attached them folding the corners over a little. I then stamped the music notes and flourishes in burgundy red and olive inks. I then stamped and cut round the butterfly and curved and raised the wings. I attached two red flowers with a brown flower brad in the centre near the butterfly. To make the keyboard strip, I stamped the keyboard in olive and edged it with red ink. For the chipboard embellishment, I inked both parts up with brown and red inks; I stamped the sentiment 'Aria Di Colorature' inside the embellishment and finished it with two small brown brads in the chipboard border.
sweet stamps blog - stamped background
I would like to enter this card into the following challenges: -
sir stampalot challenge - take flightsweet stamps blog - stamped background
Friday, 10 August 2012
Life Is Beautiful
Hey, here is a generic card I made just incase I ever need one in an emergency. I used a new stamp that I bought from a show for just £1!!!!!...Very impressed :)
I stamped my image in black and coloured it using my promarkers. I then cut her into an oval and edged her with pink grapefruit ink. I then cut a yellow backing oval for the image which I edged with red ink. To make the backing paper for my card I used a new technique I picked up. I embossed a piece of white card with a Creative Expressions Flowers Mask and used the Spiced Marmalade Distress Ink to colour the card. I then embossed the card with clear embossing powder and heated it from the back to give a smoother finish; while the embossing powder was still soft I brushed peach melba mica powder onto the backing and re-heated it. I am very impressed with the way it looks. I edged this with red ink and backed it with orange paper. I attached orange flowery ribbon across the top and lefthand side of the card and used a hat embellishment on the crossover. I built up flowers to embellish the card and from the two top ones I attached flower and butterfly metal charms with ribbon so they hang out the bottom. To finish, I stamped one of my new Alleyway sentiments 'Life is beautiful' with a speech bubble (which I won as a prize off a different card) and inked this up with red yellow and pink grapefruit.
I would like to enter this card into the following challenges: -
Watermelon Birthday
Hey, here is a card I made for the Little Red Wagon challenge using a watermelon picture as inspiration. I have had this Sarah Kay image for about a year and never used it so i'm very pleased to have found a challenge which fits it so fully.
Firstly, I stamped the image and coloured it using copics markers. I then rounded the corners with a corner punch and edged the image using pale green ink. I then cut a pink backing for the image using one of mums dies.
Next, I edged my backing card with pale pink ink and backed it with darker green paper. I then used pale pink and pale green papers ontop of the green backing. I used a butterfly punch down the edge of the pink paper which I emphasised with pink ink and attached green spotty ribbon down the join of the two papers.
I found an 'On Your Birthday' sentiment which I cut a second backing circle for and inked pink. I then hung a leaf charm off the sentiment. I cut two pink butterflies from the Cheery Lynn designs exotic butterfly die cut set; I then embossed one with pink and green embossing powders and layered them ontop of each other with a pink gem in the centre. For the flowers and leaves, I used the Marianne Creatables, Tim Holtz Alterations and Joy Craft Floral Flourishes die cut sets. I inked these up with green and pink inks, curved the petals and layered them up with a small flower brad in the centre. I added three little flowers to the top of the sentiment with a small round brad in and to finish, I added a pink gem to the corners of the green backing.
I would like to enter this card in the following challenges: -
little red wagon - watermelon
crop stop - fruitalicious
always crafting - food
incy wincy designs - sugar and spice
love to create challenge - punches and dies
simon says stamps challenge - bingo
tuesday alchemy - bingo
pile it on challenge - add some metal
cute daisy may - die cuts and punches
divas by design challenge - female
by the cute and girly - fruity
trimmies craft challenge - add a charm
Firstly, I stamped the image and coloured it using copics markers. I then rounded the corners with a corner punch and edged the image using pale green ink. I then cut a pink backing for the image using one of mums dies.
Next, I edged my backing card with pale pink ink and backed it with darker green paper. I then used pale pink and pale green papers ontop of the green backing. I used a butterfly punch down the edge of the pink paper which I emphasised with pink ink and attached green spotty ribbon down the join of the two papers.
I found an 'On Your Birthday' sentiment which I cut a second backing circle for and inked pink. I then hung a leaf charm off the sentiment. I cut two pink butterflies from the Cheery Lynn designs exotic butterfly die cut set; I then embossed one with pink and green embossing powders and layered them ontop of each other with a pink gem in the centre. For the flowers and leaves, I used the Marianne Creatables, Tim Holtz Alterations and Joy Craft Floral Flourishes die cut sets. I inked these up with green and pink inks, curved the petals and layered them up with a small flower brad in the centre. I added three little flowers to the top of the sentiment with a small round brad in and to finish, I added a pink gem to the corners of the green backing.
I would like to enter this card in the following challenges: -
little red wagon - watermelon
crop stop - fruitalicious
always crafting - food
incy wincy designs - sugar and spice
love to create challenge - punches and dies
simon says stamps challenge - bingo
tuesday alchemy - bingo
pile it on challenge - add some metal
cute daisy may - die cuts and punches
divas by design challenge - female
by the cute and girly - fruity
trimmies craft challenge - add a charm
Monday, 6 August 2012
Doggy Days
Hey, here is a card I made of our Doggy Monty :) Hes well cute and I thought hed like to be entered in the DRS designs challenge 'Show us your dogs'. Fistly, I cut his picture out into a circle and cut and embossed him with a cream and a brown circle. I then stamped the others three images and cut and embossed them in the same fashion with different brown and red backings. I edged these stamped images with browns and red ink. I then backed my backing card with red card then brown raised dots card. I arranged my circles so they all overlap each other and attatched doggy ribbon across the bottom of the card. I chose the sentiment from an old pack mum had; thought it was so funny :) I backed this onto cream, red and brown card and raised it onto the top right hand corner of the card.
To finish the card, I used a bone shaped paper clip on the corner of the sentiment and four doggy buttons around the card. Hehe how cute does Monty look :D
I would like to enter this card into the following challenges: -
Saturday, 4 August 2012
Olympic Football
Hey, here is an Olympic card I made to support the great Team GB :) I made a male card (I always neglect male cards) in red, white and blue.
I stamped the papermania pastimes image in black and coloured him in using promarkers. I then cut him into a scalloped boarder and edged the image with blue ink. I then cut a red backing and also edged this with the scalloped edge. Next, I cut a piece of blue stripy paper to back half the red edge; down the side of this I used a stripe of red glitter.

I used a red card blank which I topped with a union jack flag paper from the forever friends best of British paper pad. I edged the paper with red ink. I tied red and blue ribbon crossed down the left hand side of the card finishing with a knot. I attached a union jack button to the top corner of the image and blue, red and white card candy in the corner of the card. To finish, I added a union jack bow with two hat pins and red white and blue beads.
I would like to enter this card into the following challenges: -
st lukes charity cards challenge - going for gold
craft your days away - olympic dreams
jelly park challenges - olympic fever
scrappy frogs challenge - red white and blue - Ends 6th August
pixie dust studio pixie challenge - wins gold
sj papercrafts - olympics
the squirrel and the fox - make it sporty
365 cards - olympic rings
I used a red card blank which I topped with a union jack flag paper from the forever friends best of British paper pad. I edged the paper with red ink. I tied red and blue ribbon crossed down the left hand side of the card finishing with a knot. I attached a union jack button to the top corner of the image and blue, red and white card candy in the corner of the card. To finish, I added a union jack bow with two hat pins and red white and blue beads.
I would like to enter this card into the following challenges: -
st lukes charity cards challenge - going for gold
craft your days away - olympic dreams
jelly park challenges - olympic fever
scrappy frogs challenge - red white and blue - Ends 6th August
pixie dust studio pixie challenge - wins gold
sj papercrafts - olympics
the squirrel and the fox - make it sporty
365 cards - olympic rings
Subscribe to:
Posts (Atom)